Adding a multiple cut/paste feature to MS Word
<<Return to start of this example.
Part 1: Creating a Multi-Paste Dialog
The purpose of the function we are going to create is to bring up a dialog box, which displays a list of text clips that have previously been copied to the clipboard, and gives the user the option to select and paste one of the clips.
To get started, open a new Word document and switch to the Visual Basic Editor window. This is done either by selecting Tools/Macro/Visual Basic Editor from the menu, or simply by using the shortcut Alt-F11. Next, add a new form to the VBA project by selecting Insert/UserForm from the menu. You can change the name of the newly created form in the Properties window. We have called our form "frmClip" and we have also changed the Caption of the form to "ClipMan Text". This wording will appear on the Title Bar of the form when it is displayed.
The ClipManagerX control must now be made available to the project and added to the form. Download and install the control on your PC if you have not already done so. Next, select Tools/Additional Controls from the menu which will bring up a list of available installed controls. Check the box next to "ClipMan Control" and click "OK" and the ClipManagerX icon should appear in your Toolbox (if you can't see your Toolbox, select View/Toolbox).
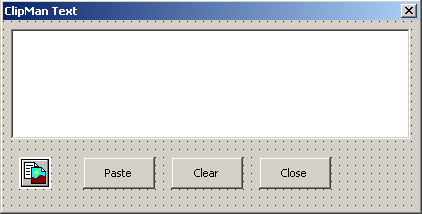
Finally, place all the required controls onto the form as shown below. In our example we have added one copy of the ClipManagerX control, one ListBox and three CommandButtons. The CommandButton captions are set to "Paste", "Clear" and "Close" and we have named the buttons accordingly: cmdPaste, cmdClear and cmdClose.

The next step is to write the code that will be executed when each of the CommandButtons is pressed... Next page